310 stories
·
2 followers

Deploying to Google Kubernetes Engine

2 Shares

Late last year, Etsy announced that we’ll be migrating our services out of self-managed data centers and into the cloud. We selected Google Cloud Platform (GCP) as our cloud provider and have been working diligently to migrate our services. Safely and securely migrating services to the cloud requires them to live in two places at once (on-premises and in the cloud) for some period of time.

In this article, I’ll describe our strategy specifically for deploying to a pair of Kubernetes clusters: one running in the Google Kubernetes Engine (GKE) and the other on-premises in our data center. We’ll see how Etsy uses Jenkins to do secure Kubernetes deploys using authentication tokens and GCP service accounts. We’ll learn about the challenge of granting fine-grained GKE access to your service accounts and how Etsy solves this problem using Terraform and Helm.

Deploying to On-Premises Kubernetes

Etsy, while new to the Google Cloud Platform, is no stranger to Kubernetes. We have been running our own Kubernetes cluster inside our data center for well over a year now, so we already have a partial solution for deploying to GKE, given that we have a system for deploying to our on-premises Kubernetes.

Our existing deployment system is quite simple from the perspective of the developer currently trying to deploy: simply open up Deployinator and press a series of buttons! Each button is labeled with its associated deploy action, such as “build and test” or “deploy to staging environment.”

Under the hood, each button is performing some action, such as calling out to a bash script or kicking off a Jenkins integration test, or some combination of several such actions.

For example, the Kubernetes portion of a Search deploy calls out to a Jenkins pipeline, which subsequently calls out to a bash script to perform a series of “docker build”, “docker tag”, “docker push”, and “kubectl apply” steps.

Why Jenkins, then? Couldn’t we perform the docker/kubectl actions directly from Deployinator?

The key is in… the keys! In order to deploy to our on-premises Kubernetes cluster, we need a secret access token. We load the token into Jenkins as a “credential” such that it is stored securely (not visible to Jenkins users), but we can easily access it from inside Jenkins code.

Now, deploying to Kubernetes is a simple matter of looking up our secret token via Jenkins credentials and overriding the “kubectl” command to always use the token.

Our Jenkinsfile for deploying search services looks something like this:

All of the deploy.sh scripts above use environment variable $KUBECTL in place of standard calls to kubectl, and so by wrapping everything in our withKubernetesEnvs closure, we have ensured that all kubectl actions are using our secret token to authenticate with Kubernetes.

Declarative Infrastructure via Terraform

Deploying to GKE is a little different than deploying to our on-premises Kubernetes cluster and one of the major reasons is our requirement that everything in GCP be provisioned via Terraform. We want to be able to declare each GCP project and all its resources in one place so that it is automatable and reproducible. We want it to be easy—almost trivial—to recreate our entire GCP setup again from scratch. Terraform allows us to do just that.

We use Terraform to declare every possible aspect of our GCP infrastructure. Keyword: possible. While Terraform can create our GKE clusters for us, it cannot (currently) create certain types of resources inside of those clusters. This includes Kubernetes resources which might be considered fundamental parts of the cluster’s infrastructure, such as roles and rolebindings.

Access Control via Service Accounts

Among the objects that are currently Terraformable: GCP service accounts! A service account is a special type of Google account which can be granted permissions like any other user, but is not mapped to an actual user. We typically use these “robot accounts” to grant permissions to a service so that it doesn’t have to run as any particular user (or as root!).

At Etsy, we already have “robot deployer” user accounts for building and deploying services to our data center. Now we need a GCP service account which can act in the same capacity.

Unfortunately, GCP service accounts only (currently) provide us with the ability to grant complete read/write access to all GKE clusters within the same project. We’d like to avoid that! We want to grant our deployer only the permissions that it needs to perform the deploy to a single cluster. For example, a deployer doesn’t need the ability to delete Kubernetes services—only to create or update them.

Kubernetes provides the ability to grant more fine-grained permissions via role-based access control (RBAC). But how do we grant that kind of permission to a GCP service account?

We start by giving the service account very minimal read-only access to the cluster. The service account section of the Terraform configuration for the search cluster looks like this:

We have now created a service account with read-only access to the GKE cluster. Now how do we associate it with the more advanced RBAC inside GKE? We need some way to grant additional permissions to our deployer by using a RoleBinding to associate the service account with a specific Role or ClusterRole.

Solving RBAC with Helm

While Terraform can’t (yet) create the RBAC Kubernetes objects inside our GKE cluster, it can be configured to call a script (either locally or remotely) after a resource is created.

Problem solved! We can have Terraform create our GKE cluster and the minimal deployer service account, then simply call a bash script which creates all the Namespaces, ClusterRoles, and RoleBindings we need inside that cluster. We can bind a role using the service account’s email address, thus mapping the service account to the desired GKE RBAC role.

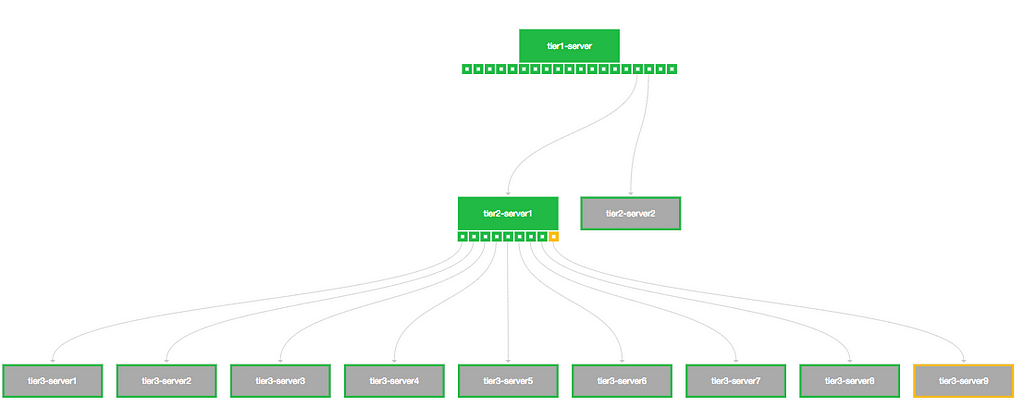
However, as Etsy has multiple GKE clusters which all require very similar sets of objects to be created, I think we can do better. In particular, each cluster will require service accounts with various types of roles, such as “cluster admin” or “deployer”. If we want to add or remove a permission from the deployer accounts across all clusters, we’d prefer to do so by making the change in one place, rather than modifying multiple scripts for each cluster.

Good news: there is already a powerful open source tool for templating Kubernetes objects! Helm is a project designed to manage configured packages of Kubernetes resources called “charts”.

We created a Helm chart and wrote templates for all of the common resources that we need inside GKE. For each GKE cluster, we have a yaml file which declares the specific configuration for that cluster using the Helm chart’s templates.

For example, here is the yaml configuration file for our production search cluster:

And here are the templates for some of the resources used by the search cluster, as declared in the yaml file above (or by nested references inside other templates)…

When we are ready to apply a change to the Helm chart—or Terraform is applying the chart to an updated GKE cluster—the script which applies the configuration to the GKE cluster does a simple “helm upgrade” to apply the new template values (and only the new values! Helm won’t do anything where it detects that no changes are needed).

Integrating our New System into the Pipeline

Now that we have created a service account which has exactly the permissions we require to deploy to GKE, we only have to make a few simple changes to our Jenkinsfile in order to put our new system to use.

Recall that we had previously wrapped all our on-premises Kubernetes deployment scripts in a closure which ensured that all kubectl commands use our on-premises cluster token. For GKE, we use the same closure-wrapping style, but instead of overriding kubectl to use a token, we give it a special kube config which has been authenticated with the GKE cluster using our new deployer service account. As with our secret on-premises cluster token, we can store our GCP service account key in Jenkins as a credential and then access it using Jenkins’ withCredentials function.

Here is our modified Jenkinsfile for deploying search services:

And there you have it, folks! A Jenkins deployment pipeline which can simultaneously deploy services to our on-premises Kubernetes cluster and to our new GKE cluster by associating a GCP service account with GKE RBAC roles.

Migrating a service from on-premises Kubernetes to GKE is now (in simple cases) as easy as shuffling a few lines in the Jenkinsfile. Typically we would deploy the service to both clusters for a period of time and send a percentage of traffic to the new GKE version of the service under an A/B test. After concluding that the new service is good and stable, we can stop deploying it on-premises, although it’s trivial to switch back in an emergency.

Best of all: absolutely nothing has changed from the perspective of the average developer looking to deploy their code. The new logic for deploying to GKE remains hidden behind the Deployinator UI and they press the same series of buttons as always.

Thanks to Ben Burry, Jim Gedarovich, and Mike Adler who formulated and developed the Helm-RBAC solution with me.

Read the whole story
futurile
2138 days ago
reply
London
Share this story
Delete

Time to “Hello, World”: VMs vs. containers vs. PaaS vs. FaaS

3 Shares


Do you want to build applications on Google Cloud Platform (GCP) but have no idea where to start? That was me, just a few months ago, before I joined the Google Cloud compute team. To prepare for my interview, I watched a bunch of GCP Next 2017 talks, to get up to speed with application development on GCP.

And since there is no better way to learn than by doing, I also decided to build a “Hello, World” web application on each of GCP’s compute offerings—Google Compute Engine (VMs), Google Kubernetes Engine (containers), Google App Engine (PaaS), and Google Cloud Functions (FaaS). To make this exercise more fun (and to do it in a single weekend), I timed things and took notes, the results of which I recently wrote up in a lengthy Medium post—check it out if you’re interested in following along and taking the same journey. 

So, where do I run my code?


At a high level, though, the question of which compute option to use is... it depends. Generally speaking, it boils down to thinking about the following three criteria:
  1. Level of abstraction (what you want to think about)
  2. Technical requirements and constraints
  3. Where your team and organization are going
Google Developer Advocate Brian Dorsey gave a great talk at Next last year on Deciding between Compute Engine, Container Engine, App Engine; here’s a condensed version:


As a general rule, developers prefer to take advantage of the higher levels of compute abstraction ladder, as it allows us to focus on the application and the problem we are solving, while avoiding undifferentiated work such as server maintenance and capacity planning. With Cloud Functions, all you need to think about is code that runs in response to events (developer's paradise!). But depending on the details of the problem you are trying to solve, technical constraints can pull you down the stack. For example, if you need a very specific kernel, you might be down at the base layer (Compute Engine). (For a good resource on navigating these decision points, check out: Choosing the right compute option in GCP: a decision tree.)

What programming language should I use?

GCP broadly supports the following programming languages: Go, Java, .NET, Node.js, PHP, Python, and Ruby (details and specific runtimes may vary by the service). The best language is a function of many factors, including the task at hand as well as personal preference. Since I was coming at this with no real-world backend development experience, I chose Node.js.

Quick aside for those of you who might be not familiar with Node.js: it’s an asynchronous JavaScript runtime designed for building scalable web application back-ends. Let’s unpack this last sentence:

  • Asynchronous means first-class support for asynchronous operations (compared to many other server-side languages where you might have to think about async operations and threading—a totally different mindset). It’s an ideal fit for most cloud applications, where a lot of operations are asynchronous. 
  • Node.js also is the easiest way for a lot of people who are coming from the frontend world (where JavaScript is the de-facto language) to start writing backend code. 
  • And there is also npm, the world’s largest collection of free, reusable code. That means you can import a lot of useful functionality without having to write it yourself.


Node.js is pretty cool, huh? I, for one, am convinced!

On your mark… Ready, set, go!

For my interview prep, I started with Compute Engine and VMs first, and then moved up the levels of compute service-abstraction ladder, to Kubernetes Engine and containers, App Engine and apps, and finally Cloud Functions. The following table provides a quick summary along with links to my detailed journey and useful getting started resources.


Getting from point A to point B
Time check and getting started resources
Compute Engine

Basic steps:
  1. Create & set up a VM instance
  2. Set up Node.js dev environment
  3. Code “Hello, World”
  4. Start Node server
  5. Expose the app to external traffic
  6. Understand how scaling works

4.5 hours

Kubernetes Engine

Basic steps:
  1. Code “Hello, World”
  2. Package the app into a container
  3. Push the image to Container Registry
  4. Create a Kubernetes cluster
  5. Expose the app to external traffic
  6. Understand how scaling works

6 hours

App Engine

Basic steps:
  1. Code “Hello, World”
  2. Configure an app.yaml project file
  3. Deploy the application
  4. Understand scaling options

1.5-2 hours

Cloud Functions

Basic steps:
  1. Code “Hello, World”
  2. Deploy the application

15 minutes


Time-to-results comparison

Although this might be somewhat like comparing apples and oranges, here is a summary of my results. (As a reminder, this is just in the context of standing up a “Hello, World” web application from scratch, all concerns such as running the app in production aside.)

Your speed-to-results could be very different depending on multiple factors, including your level of expertise with a given technology. My goal was to grasp the fundamentals of every option in the GCP’s compute stack and assess the amount of work required to get from point A to point B… That said, if there is ever a cross-technology Top Gear fighter jet vs. car style contest on standing up a scalable HTTP microservice from scratch, I wouldn’t be afraid to take on a Kubernetes grandmaster like Kelsey Hightower with Cloud Functions!

To find out more about application development on GCP, check out Computing on Google Cloud Platform. Don’t forget—you get $300 in free credits when you sign up.

Happy building!

Further reading on Medium:
Read the whole story
futurile
2138 days ago
reply
London
Share this story
Delete

Lessons from Building Observability Tools at Netflix

2 Comments and 4 Shares

Our mission at Netflix is to deliver joy to our members by providing high-quality content, presented with a delightful experience. We are constantly innovating on our product at a rapid pace in pursuit of this mission. Our innovations span personalized title recommendations, infrastructure, and application features like downloading and customer profiles. Our growing global member base of 125 million members can choose to enjoy our service on over a thousand types of devices. If you also consider the scale and variety of content, maintaining the quality of experience for all our members is an interesting challenge. We tackle that challenge by developing observability tools and infrastructure to measure customers’ experiences and analyze those measurements to derive meaningful insights and higher-level conclusions from raw data. By observability, we mean analysis of logs, traces, and metrics. In this post, we share the following lessons we have learned:

  • At some point in business growth, we learned that storing raw application logs won’t scale. To address scalability, we switched to streaming logs, filtering them on selected criteria, transforming them in memory, and persisting them as needed.
  • As applications migrated to having a microservices architecture, we needed a way to gain insight into the complex decisions that microservices were making. Distributed request tracing is a start, but is not sufficient to fully understand application behavior and reason about issues. Augmenting the request trace with application context and intelligent conclusions is also necessary.
  • Besides analysis of logging and request traces, observability also includes analysis of metrics. By exploring metrics anomaly detection and metrics correlation, we’ve learned how to define actionable alerting beyond just threshold alerting.
  • Our observability tools need to access various persisted data types. Choosing which kind of database to store a given data type depends on how each particular data type is written and retrieved.
  • Data presentation requirements vary widely between teams and users. It is critical to understand your users and deliver views tailored to a user’s profile.

Scaling Log Ingestion

We started our tooling efforts with providing visibility into device and server logs, so that our users can go to one tool instead of having to use separate data-specific tools or logging into servers. Providing visibility into logs is valuable because log messages include important contextual information, especially when errors occur.

However, at some point in our business growth, storing device and server logs didn’t scale because the increasing volume of log data caused our storage cost to balloon and query times to increase. Besides reducing our storage retention time period, we addressed scalability by implementing a real-time stream processing platform called Mantis. Instead of saving all logs to persistent storage, Mantis enables our users to stream logs into memory, and keep only those logs that match SQL-like query criteria. Users also have the choice to transform and save matching logs to persistent storage. A query that retrieves a sample of playback start events for the Apple iPad is shown in the following screenshot:

Mantis query results for sample playback start events

Once a user obtains an initial set of samples, they can iteratively refine their queries to narrow down the specific set of samples. For example, perhaps the root cause of an issue is found from only samples in a specific country. In this case, the user can submit another query to retrieve samples from that country.

The key takeaway is that storing all logs in persistent storage won’t scale in terms of cost and acceptable query response time. An architecture that leverages real-time event streams and provides the ability to quickly and iteratively identify the relevant subset of logs is one way to address this problem.

Distributed Request Tracing

As applications migrated to a microservices architecture, we needed insight into the complex decisions that microservices are making, and an approach that would correlate those decisions. Inspired by Google’s Dapper paper on distributed request tracing, we embarked on implementing request tracing as a way to address this need. Since most inter-process communication uses HTTP and gRPC (with the trend for newer services to use gRPC to benefit from its binary protocol), we implemented request interceptors for HTTP and gRPC calls. These interceptors publish trace data to Apache Kafka, and a consuming process writes trace data to persistent storage.

The following screenshot shows a sample request trace in which a single request results in calling a second tier of servers, one of which calls a third-tier of servers:

Sample request trace

The smaller squares beneath a server indicate individual operations. Gray-colored servers don’t have tracing enabled.

A distributed request trace provides only basic utility in terms of showing a call graph and basic latency information. What is unique in our approach is that we allow applications to add additional identifiers to trace data so that multiple traces can be grouped together across services. For example, for playback request traces, all the requests relevant to a given playback session are grouped together by using a playback session identifier. We also implemented additional logic modules called analyzers to answer common troubleshooting questions. Continuing with the above example, questions about a playback session might be why a given session did or did not receive 4K video, or why video was or wasn’t offered with High Dynamic Range.

Our goal is to increase the effectiveness of our tools by providing richer and more relevant context. We have started implementing machine learning analysis on error logs associated with playback sessions. This analysis does some basic clustering to display any common log attributes, such as Netflix application version number, and we display this information along with the request trace. For example, if a given playback session has an error log, and we’ve noticed that other similar devices have had the same error with the same Netflix application version number, we will display that application version number. Users have found this additional contextual information helpful in finding the root cause of a playback error.

In summary, the key learnings from our effort are that tying multiple request traces into a logical concept, a playback session in this case, and providing additional context based on constituent traces enables our users to quickly determine the root cause of a streaming issue that may involve multiple systems. In some cases, we are able to take this a step further by adding logic that determines the root cause and provides an English explanation in the user interface.

Analysis of Metrics

Besides analysis of logging and request traces, observability also involves analysis of metrics. Because having users examine many logs is overwhelming, we extended our offering by publishing log error counts to our metrics monitoring system called Atlas, which enables our users to quickly see macro-level error trends using multiple dimensions, such as device type and customer geographical location. An alerting system also allows users to receive alerts if a given metric exceeds a defined threshold. In addition, when using Mantis, a user can define metrics derived from matching logs and publish them to Atlas.

Next, we have implemented statistical algorithms to detect anomalies in metrics trends, by comparing the current trend with a baseline trend. We are also working on correlating metrics for related microservices. From our work with anomaly detection and metrics correlation, we’ve learned how to define actionable alerting beyond just basic threshold alerting. In a future blog post, we’ll discuss these efforts.

Data Persistence

We store data used by our tools in Cassandra, Elasticsearch, and Hive. We chose a specific database based primarily on how our users want to retrieve a given data type, and the write rate. For observability data that is always retrieved by primary key and a time range, we use Cassandra. When data needs to be queried by one or more fields, we use Elasticsearch since multiple fields within a given record can be easily indexed. Finally, we observed that recent data, such as up to the last week, is accessed more frequently than older data, since most of our users troubleshoot recent issues. To serve the use case where someone wants to access older data, we also persist the same logs in Hive but for a longer time period.

Cassandra, Elasticsearch, and Hive have their own advantages and disadvantages in terms of cost, latency, and queryability. Cassandra provides the best, highest per-record write and read rates, but is restrictive for reads because you must decide what to use for a row key (a unique identifier for a given record) and within each row, what to use for a column key, such as a timestamp. In contrast, Elasticsearch and Hive provide more flexibility with reads because Elasticsearch allows you to index any field within a record, and Hive’s SQL-like query language allows you to match against any field within a record. However, since Elasticsearch is primarily optimized for free text search, its indexing overhead during writes will demand more computing nodes as write rate increases. For example, for one of our observability data sets, we initially stored data in Elasticsearch to be able to easily index more than one field per record, but as the write rate increased, indexing time became long enough that either the data wasn’t available when users queried for it, or it took too long for data to be returned. As a result, we migrated to Cassandra, which had shorter write ingestion time and shorter data retrieval time, but we defined data retrieval for the three unique keys that serve our current data retrieval use cases.

For Hive, since records are stored in files, reads are relatively much slower than Cassandra and Elasticsearch because Hive must scan files. Regarding storage and computing cost, Hive is the cheapest because multiple records can be kept in a single file, and data isn’t replicated. Elasticsearch is most likely the next more expensive option, depending on the write ingestion rate. Elasticsearch can also be configured to have replica shards to enable higher read throughput. Cassandra is most likely the most expensive, since it encourages replicating each record to more than one replica in order to ensure reliability and fault tolerance.

Tailoring User Interfaces for Different User Groups

As usage of our observability tools grows, users have been continually asking for new features. Some of those new feature requests involve displaying data in a view customized for specific user groups, such as device developers, server developers, and Customer Service. On a given page in one of our tools, some users want to see all types of data that the page offers, whereas other users want to see only a subset of the total data set. We addressed this requirement by making the page customizable via persisted user preferences. For example, in a given table of data, users want the ability to choose which columns they want to see. To meet this requirement, for each user, we store a list of visible columns for that table. Another example involves a log type with large payloads. Loading those logs for a customer account increases the page loading time. Since only a subset of users are interested in this log type, we made loading these logs a user preference.

Examining a given log type may require domain expertise that not all users may have. For example, for a given log from a Netflix device, understanding the data in the log requires knowledge of some identifiers, error codes, and some string keys. Our tools try to minimize the specialized knowledge required to effectively diagnose problems by joining identifiers with the data they refer to, and providing descriptions of error codes and string keys.

In short, our learning here is that customized views and helpful context provided by visualizations that surface relevant information are critical in communicating insights effectively to our users.

Conclusion

Our observability tools have empowered many teams within Netflix to better understand the experience we are delivering to our customers and quickly troubleshoot issues across various facets such as devices, titles, geographical location, and client app version. Our tools are now an essential part of the operational and debugging toolkit for our engineers. As Netflix evolves and grows, we want to continue to provide our engineers with the ability to innovate rapidly and bring joy to our customers. In future blog posts, we will dive into technical architecture, and we will share our results from some of our ongoing efforts such as metrics analysis and using machine learning for log analysis.

If any of this work sounds exciting to you, please reach out to us!

— Kevin Lew (@kevinlew15) and Sangeeta Narayanan (@sangeetan)


Lessons from Building Observability Tools at Netflix was originally published in Netflix TechBlog on Medium, where people are continuing the conversation by highlighting and responding to this story.

Read the whole story
futurile
2139 days ago
reply
London
Share this story
Delete
2 public comments
JayM
2140 days ago
reply
Cool stuff.
Atlanta, GA
ecliptik
2144 days ago
reply
Streaming logs to memory and only specific queries to persistent storage is a great #observability pattern. #devops
San Diego

The surprising science behind why ‘easy days’ and ‘hard days’ make a difference in your workout

1 Share
Stephen Seiler’s awakening occurred shortly after he moved to Norway in the late 1990s. The American-born exercise physiologist was out on a forested trail when he saw one of the country’s elite cross-country skiers run past – and then suddenly stop at the bottom of a hill and start walking up.“And I said, well what the heck are you doing? No pain, no gain!” he later recalled. “But it turned out she had a very clear idea of what she was doing.”Seiler’s observation led him to devote 15 years to studying how world-beating endurance athletes train, revealing that they push harder on their hard days but go easier on their easy days than lesser athletes. But as research that will be presented this week at the American College of Sports Medicine (ACSM) conference in Minnesota reveals, most us haven’t incorporated these findings into our exercise programs – which means we’re not training as effectively as we should.When Seiler began analyzing the training of elite athletes in sports such as cross-country skiing and rowing, he found a consistent pattern. They spent about 80 per cent of their training time going relatively easy, even to the point of walking up hills to avoid pushing too hard. And most of the other 20 per cent was gut-churningly hard, with very little time spent at medium-effort levels.This approach is often referred to as “polarized” training, since it emphasizes the extremes of very easy and very hard efforts. The pattern has now been observed in top athletes across almost all endurance sports, including cycling, running and triathlon. It was popularized in endurance coach Matt Fitzgerald’s 2014 book 80/20 Running. But it’s still not necessarily what athletes, especially less experienced ones, actually do.In the new study being presented at the ACSM conference, a team led by Ball State University kinesiology researcher Lawrence Judge followed a group of collegiate distance runners through a 14-week season. The coaches were asked to assign an intended difficulty rating, on a scale of one to 10, for each day’s workout. Using the same scale, the athletes were then asked to rate how hard they actually found the workouts.The results were telling. On easy days, when the coaches wanted an effort level of 1.5, the athletes instead ran at an effort level of 3.4 on average. On hard days, conversely, the coaches asked for an effort of 8.2 but the athletes only delivered 6.2. Instead of polarized training, as the coaches intended, the athletes were letting most of the sessions drift into the middle.The new findings echo a similar 2001 study by Carl Foster, an exercise physiologist at the University of Wisconsin-La Crosse, who is among the pioneers of using subjective perception of effort to guide training. The problem, he says, is that athletes have the misguided sense that the easy days are too easy – and as a result, on hard days, they’re simply too tired to push hard enough to get the biggest fitness gains.To Seiler, who in addition to holding an academic post is a research consultant with the Norwegian Olympic Federation, the willingness to keep the easy days easy – “intensity discipline,” he calls it – is one of the traits that distinguishes successful and unsuccessful athletes.Of course, the same principles apply even if you don’t have a coach. If you try to hammer every workout, you’ll never be fresh enough to really push your limits; if you jog every run, you’re not challenging yourself enough to maximize your fitness.Figuring out the appropriate intensity doesn’t have to be complicated, Foster adds. According to his “Talk Test,” if you can speak comfortably in complete sentences, you’re going at an appropriate pace for easy days. If you can barely gasp out a word at a time, you’re in the hard zone. If you can speak, with effort, in broken sentences, you’re in the middle zone.The hard part isn’t identifying the training zones – it’s having the discipline to adhere to them. Most of us, Foster believes, have internalized some vestigial remnant of the puritan work ethic, conflating hard work with virtue. But to truly push your limits, you sometimes need to take it easy.Alex Hutchinson (@sweatscience) is the author of Endure: Mind, Body, and the Curiously Elastic Limits of Human Performance.
Read the whole story
futurile
2147 days ago
reply
London
Share this story
Delete

Why I Don’t Use Digital Productivity Tools (or How a Notebook Makes Me More Productive)

2 Comments

A Guest Post by Curtis McHale

It seems that every day we are graced with a new digital productivity tool or an older one is talking about the next version with all the new features that will wow us. About two years ago I jumped off that band wagon in favour of a notebook and a pen for personal productivity.

The only digital tool I use is Trello and that is only used when I need to collaborate with web development clients. I have nothing in it of a personal nature.

Today I’m going to walk you through my modified Bullet Journal system and how I got there.

How I Ended up Analog in a Digital World

I think that so many people end up with digital tools or the newest application for … whatever because they embrace the any benefit mindset. This is the idea introduced by Cal Newport that says, if there is some benefit then we use the tools without any regard to the costs.

There is some benefit to digital tools. It’s easier to slip your phone in your pocket and then use it to capture tasks throughout your day. A notebook requires pen and that notebook. I don’t have this when I’m out for a run in the mountains so there are things I miss, and this is a good thing.

I’ve used digital tools before and always got them to a point where I would have 10,000 things on lists that I was never going to do. Things that in a moment 10 months ago seemed like a good idea, so I pushed the decision off on future me. Future me had no more time than in the past, so I’d just keep kicking the can down the road.

This is the first place where an analog tool is beneficial. The weight of moving a task is so much heavier with paper. You have to write it down in a new spot. You have to touch it instead of telling your task manager to bump the task forward by a month. By enforcing the constraint of analog, I stopped building lists that were 10,000 items long.

It was way to much work to move the task around. The fact that it feels like a huge amount of effort means that the tasks aren’t high enough value for me to take any action on.

Instead, I keep a two page spread of ideas for things I might work on in the next quarter. When the next quarter comes up I pick one or two to work on. The rest have the qualify again to move to the next list, and most of them never move again.

From there I break projects down into the weeks of the quarter. This is how I track my internal projects. I really don’t have to collaborate with anyone to write books or launch courses, so those projects can live in a spot where only I can see it.

The next step in my process starts at the end of every month as I migrate all my tasks from the Future Log to my monthly spread. To do this I break down the month into weeks. If a single weeks spans two months, it gets on both of them.


This is the key to each month. I revisit it each week as I’m planning the week to see if there are any tasks that need to get done in a given week. If I follow up with a prospect and need to do it again next week, their name will head back to the monthly spread first.

Like I said, the key to each week is the monthly spread. I start planning my week by looking at the things that I just can’t move. For me currently that’s 3pm Tuesday and Thursday and 12pm Wednesday when I either need to be at figure skating with a kid or watching my other kids so my wife can coach figure skating.

From there I’ll add any other appointments that are inside my standard work hours. That covers any family appointments or client meetings that need to be handled. This will also include any self care, like running because without proper self care you’re going to burn out.

Only now can I add in the blocks of time that I can work on client work or internal projects. I generally work on them in three hours blocks, during which my phone is in do not disturb mode so that no one can reach me.

From there I start logging things daily. Each day gets it’s own heading and I use a bullet for each task. I use my Bullet Journal as more than just a standard Bullet Journal though. In mine you’ll find tasks mixed with feelings for the day and logging how much sleep my Fitbit tells me I got.

The only other thing you’ll see in my notebook on purpose is a sticky note. I’ll use one after I’m done writing this to place a task for tomorrow where I should be editing this post and checking against any editorial suggestions that are available on The Cramped.

Tomorrow that task and emailing the piece will get put in with the regular tasks for the day and the sticky note will go in the garbage.

How I Deal with Trello on Paper

I did mention at the beginning that I use Trello to manage collaborative work with clients. But I don’t check in with it all the time. In fact, any task that I should be doing for any project makes it’s way to my journal including any task that is sitting in Trello waiting for me to deal with it.

They key here is my planning session before I’m done for the day. At the end of every day I’ll look at my time blocks for the next day and then at the tasks that need to get done inside those time blocks. I’ll make sure that I write down enough information from the tasks so that I can do it without looking at Trello.

By doing it this way I don’t assume that I have the information needed only to find the next day when I dive into Trello that the client really asked a question that I need to answer and I can’t move forward with the project. If that is the case, I catch it the night before and can deal with it so that most of the time the task is properly ready to be done the next day. If it’s not, I’ve already picked tasks that are ready so I do them instead of sitting and waiting for client feedback.

Things I Didn’t Mention

There are a few things I haven’t mentioned because they’re standard Bullet Journal technique. I use the standard Index format from Bullet Journal and the standard Future Log. I put around 6 months of “future” in my future log and then a final entry for anything that’s further away than 6 months. I go through a notebook in around 4 months so that almost always means that I have little planned out in the “far future” heading.

The biggest thing that a paper based system did for me was to help me say no to things right now. It helped me decide to not look at digital tools, because I won’t be using them. I save hours per month not reading about the latest task management application sweeping productivity circles.

The biggest hang up I had starting with a notebook was looking for ideas online on how to get started. Almost all of them were done by people that were way more artistic than I was. The only reason you’re going to see flowers in my notebook is because my kids got it and decided that pink flowers were perfect for the page. Same goes for all the fancy titles you see out there or the fancy monthly spreads.

My notebook is basic and functional. My only goal with it is to track my tasks and make sure I don’t overload myself. It’s not supposed to be an art piece and your notebook doesn’t need to be either.


Curtis is a husband and father of three. He writes about how to run a business well while still getting to be a good parent. His latest book is Analogue Productivity: Bring more value to work with a pen and paper.

Read the whole story
futurile
2149 days ago
reply
Nice
London
Share this story
Delete
1 public comment
jhamill
2156 days ago
reply
I've watched a couple of YouTube videos and browsed some Bullet Journal How To's and they are *all* way to artistic for my taste and ability. I'm right here with Curtis, basic and functional. I just need to, you know, actually use it on a daily basis.
California
eilatan
2155 days ago
The "original" Bullet Journal format is much closer to what Curtis uses, as opposed to what you'll see on YouTube. I think you get the super artistic bullet journals when planners collide with scrapbooking. (Mine is super functional with stickers mainly because I like stickers.)
jhamill
2155 days ago
Oh, I know. I just need to start actually using my notebooks. I always get everything set up and going for a day or two, maybe a week and then I just stop using them. It's annoying that I can't keep up with it.

Should Your Company Make Money?

1 Comment and 2 Shares

It used to be that in order to survive, businesses had to sell goods or services above cost. But that model is so 20th century. The new way to make it in business is to spend big, grow fast and use Kilimanjaro-size piles of investor cash to subsidize your losses, with a plan to become profitable somewhere down the road.” From The Entire Economy Is MoviePass Now

There are a few reasons that people initially run their business like this.

  1. The business depends on the Network Effect. Social networks are the epitome of this. They have more value the more people are using them. If the business requires a large network to be valuable, then growing the network will be targeted, even if it means running a loss in the meantime.
  2. The business is focused on long-term growth and management is willing to invest the profits into growing the business: Strategic Reinvestment. A good example here is Amazon. This model can be sustainable, but will have lots of detractors if the company is public or has anxious private investors.
  3. The business is engaged in a more nefarious version of the above, called Dumping. Stereotypical examples of this are when Walmart enters a new market or how Uber has planned to dominate ride-hailing before massive movement to driverless technology. With dumping, the business is willing to take great short term losses to establish a monopoly.
  4. Investor Storytime, where a startup doesn’t really have a solid business value, but relies on marketing to investors to generate funding or buyout.

The first two cases (Network Effect and Strategic Reinvestment) are arguably solid business choices in many cases. The latter two (Dumping and Investor Storytime) are clearly problematic. Understandably, the line between Dumping and Strategic Reinvestment can be gray and unclear. People engaging in Dumping and Investor Storytime take advantage of this confusion and will often disguise their motives as pursuing Network Effect or Strategic Reinvestment.

What seems to be happening is that we have a growing fraction of businesses, especially in venture capital and especially in Silicon Valley, that are engaging in these fraudulent growth models. We have to learn to detect the bullshit and divest from these businesses.

Read the whole story
futurile
2149 days ago
reply
And creating a market.
London
Share this story
Delete
Next Page of Stories